
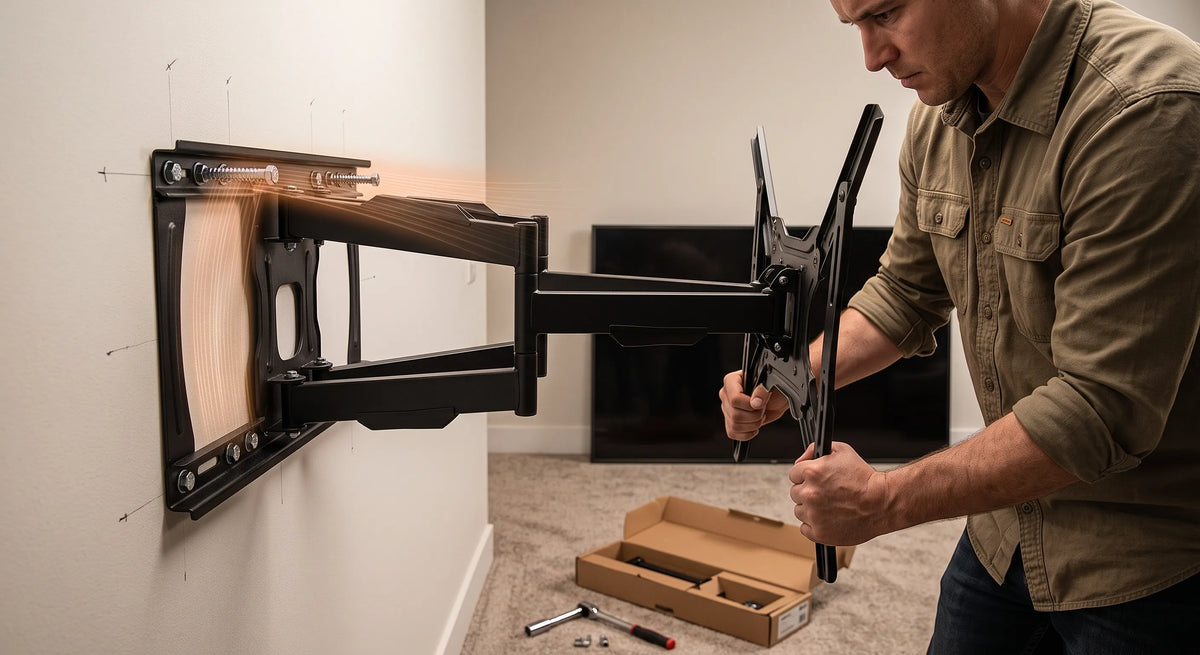
You carry a brand new, massive flat screen panel into your living room, set it on the carpet, and unbox a sleek metal bracket. The box claims it supports up to 85 inches, but as you lift the heavy glass and metal, a lingering doubt creeps in. Will that thin sheet of drywall and a couple of steel screws really hold a two thousand dollar investment off the floor? What actually happens if the mount gives out?
Mounting a television is one of the most satisfying home improvement projects, yet it carries genuine anxiety. A falling display damages more than just the screen; it tears up drywall, destroys furniture, and poses a serious safety hazard to pets and children. Knowing how weight limits work, how to calculate total physical load, and how wall structures interact with metal brackets transforms that anxiety into absolute confidence. Let's break down the mechanics of wall mount weight capacities so you can suspend your TV securely, no matter its size.
Understanding TV Wall Mount Weight Limits
Every wall mount ships with a maximum weight rating printed on the box and stamped into its manual. That number isn't a rough guess pulled out of thin air by a marketing team. It represents an engineering boundary calculated through structural metallurgy, stress analysis, and safety compliance testing.
|
Section |
Details |
|
Total System Weight Load |
TV Body + Soundbar + Streaming Device + Mount |
|
Wall Anchorage Point |
Wood Studs, Concrete / Brick, Metal Studs w/ Toggles |
Why Mount Capacity Ratings Matter
Respecting weight capacity isn't simply about keeping metal from bending like an aluminum soda can. When a mount operates within its designed capacity, its joints glide smoothly, its locking mechanisms engage securely, and its steel plate remains flat against the wall.
Exceeding that capacity triggers a chain reaction of structural mechanical failures. First, soft metals around hinge points begin to deform. Next, pitch adjustment mechanisms slip, causing the display to tilt downward uncontrollably. Finally, under excessive strain, fasteners stretch, shear, or pull completely out of the wall structure. A mount operating near or above its limit is a ticking mechanical clock waiting for material fatigue to win.
The Difference Between Dynamic Load and Static Weight
To understand weight limits, you must distinguish between static weight and dynamic load. Static weight is your display resting motionless on a fixed, flat wall bracket. Gravity pulls straight down, exerting a simple vertical shear force on the mounting screws.
Dynamic load enters the equation the second you touch the TV. Pulling a full motion mount out from the wall, swiveling it toward the kitchen, or tilting it to avoid glare converts pure down force into rotational torque. Moving a fifty pound TV two feet away from the wall generates significantly more strain on the wall anchors than that same fifty pound TV resting flush against the wall studs. That movement creates dynamic energy. If you move the arm briskly or stop it abruptly at the end of its travel, the instant torque spikes well past the static weight of the TV.
How UL Testing Standards Determine Official Ratings
Underwriters Laboratories (UL) sets the gold standard for hardware safety testing. When a manufacturer claims a mount is UL Listed, it has undergone rigorous lab testing designed to induce failure.
To pass standard UL 2442 certification, a wall mount must hold four times its claimed maximum weight capacity for a continuous time period without structural failure. If a mount claims an 80 pound limit, UL lab technicians load that mount with 320 pounds of dead steel weights. If the mount sags, warps, or drops the load during the test window, it fails certification.
While that 4x safety factor gives you an incredible engineering buffer, it is not an invitation to overload your hardware. That cushion accounts for imperfect wall studs, minor installation errors, subtle home foundation settling, and the intense rotational strain of daily use.
How to Find Your TV Wall Mount's Weight Limit
If you tossed the original packaging into the recycling bin years ago, don't worry. Uncovering the exact operational weight boundary of an installed or secondhand mount is straightforward if you know where to look.
Checking the Manufacturer Documentation and Stamped Ratings
The definitive source for safety limits is the product manual, which you can almost always find online by searching the exact model number. If you can't find the paper manual, examine the metal frame itself.
Quality manufacturers stamp technical parameters directly into the cold rolled steel. Look at the back of the wall plate that presses against the drywall, or check the inner surface of the articulating arms. You will often find debossed text stating something like "MAX LOAD: 45kg / 100lbs." If you find a model code stamped into the frame, a quick online lookup will retrieve the original technical specification sheet.
Reading the UL Certification Badge
Look for a silver or white hologram sticker on the steel plate, usually accompanied by the stylized "UL" mark. Next to or beneath this badge, you will see specific ratings.
Be sure to read the wording carefully. Some badges display the UL listing file number alongside the maximum verified load. If you see a UL symbol without a specified weight rating printed nearby, search the UL Product iQ database using the manufacturer's name to cross reference the certified operational threshold.
Identifying Limits on Fixed vs. Full Motion Swivel Mounts
Mount design dictates its inherent structural strength. You can generally estimate a mount's load category by its form factor:
|
Mount Type |
Details |
|
Fixed (Low Profile) Mounts |
These are structurally simple. Consisting of two rigid steel rails hooked over a flat wall plate, they keep the screen within an inch or two of the drywall. Because they experience almost zero rotational strain, fixed mounts routinely offer massive weight capacities, often between 100 and 200 pounds, even on budget models. |
|
Adding a vertical tilt mechanism introduces pivot pins and tension knobs. These usually handle between 75 and 150 pounds, with weight capacity bound by how firmly the tilt locks grip under load. |
|
|
Full Motion (Articulating) Mounts |
Featuring extension arms with multiple elbow hinges, these mounts experience extreme rotational torque when fully extended. Single arm full motion mounts top out at 35 to 60 pounds. Dual arm heavy duty articulating mounts use twin steel scissor arms to spread the load across two wall studs, allowing them to support 100 to 150 pounds safely. |
Can a TV Be Too Heavy to Mount on a Wall?
The short answer is a resounding no, modern flat screens are rarely too heavy for wall mounting, provided you use commercial grade hardware attached directly to solid framing. However, matching modern ultra large displays with light duty consumer mounts can lead to structural failure.
Comparing TV Weight to Mount Capacity
Display technology has advanced dramatically over the last decade. A 65 inch plasma screen from 2008 could weigh a bone crushing 110 pounds. Today, a 65 inch OLED display weighs less than 45 pounds without its desk stand.
Despite these weight reductions, display screen sizes have grown exponentially. An 85 inch or 98 inch LED screen might still weigh between 75 and 120 pounds. Danger strikes when home owners assume a mount that easily held their modern 55 inch TV will safely support a new 85 inch monster simply because "it fits the hooks." Always compare the precise bare weight of the new panel against the mount's documented rating before lifted hardware touches the bracket.
The Role of VESA Patterns in Weight Distribution
The VESA (Video Electronics Standards Association) pattern refers to the square or rectangular arrangement of four threaded screw holes on the back of your television. Common configurations include 200x200mm, 400x400mm, or 600x400mm.
|
VESA Pattern |
What It Means |
|
200 × 200 mm |
200 mm horizontal and vertical distance between mounting holes |
|
400 × 400 mm |
400 mm horizontal and vertical distance between mounting holes |
|
600 × 400 mm |
600 mm horizontal and 400 mm vertical distance between mounting holes |
While VESA patterns primarily standardize screw spacing, they also dictate load distribution across the TV's internal chassis. Heavy TVs use larger VESA configurations (like 600x400mm or 800x400mm) to spread physical tension across a wider area of the frame. If you use a physical adapter plate to shrink an ultra large TV's wide VESA pattern down to a small wall mount bracket, you concentrate all that tension into a tight central point, increasing the risk of structural frame warping or screw shear under load.
Understanding Leverage: Why Arm Extension Increases Strain
Think of an extended mount arm as a crowbar pulling on your wall studs. Physics defines torque as force multiplied by distance ($T = F \times d$).
When the TV rests flush against the wall (2 inches away), that 80 pound downward force generates roughly 13 foot pounds of rotational pulling force on the top wall anchors.
Pull that same 80 pound TV outward on a 24 inch articulating arm extension, and the rotational force tearing at the top lag screws shoots up to 160 foot pounds of pull out torque. That tremendous leverage will quickly pull lag bolts right out of split wooden studs or snap cheap, low grade hardware at the head.
Critical Factors Beyond the TV Mount Itself
A mount certified for 200 pounds will still pull off the wall if the substrate behind it fails. The structural surface inside your wall dictates overall load capacity far more than the steel mount itself.
|
Wall Type |
Load Bearing Capability |
|
Concrete / Brick |
Maximum Weight Capacity (Strongest) |
|
Double Wood Stud |
High Weight Capacity |
|
Single Wood Stud |
Moderate Weight Capacity |
|
Metal Framing |
Requires Specialty Toggle Hardware |
|
Bare Drywall |
UNACCEPTABLE FOR TV MOUNTS |
Drywall Limits: What Single Sheet Gypsum Can Actually Hold
Standard residential interior walls consist of half inch or five eighths inch gypsum drywall screwed over framing studs. Gypsum is essentially compressed chalk dust sandwiched between sheets of heavy paper. It offers almost no shear strength and virtually zero pull out resistance.
Never mount a television bracket directly to bare drywall using standard anchors.
While specialized toggle bolts can hold light static loads in gypsum board, dynamic movement, vibration, screen adjustments, and leverage will cause the crumbling gypsum core to break down over time. Within weeks or months, the anchor hole widens, the wall bracket sags, and the entire assembly pulls out of the wall.
Wood Studs: Standard 16 Inch Spacing and Screw Depth Requirements
Residential home framing relies on vertical wood studs, typically 2x4 or 2x6 pine dimensional lumber, spaced 16 inches apart from center to center (though older homes or custom layouts may use 24 inch spacing).
Wood framing provides an extraordinary anchor when hardware is installed correctly. A quality 5/16 inch steel lag bolt driven into the center of a healthy pine stud offers over 1,000 pounds of ultimate shear strength and hundreds of pounds of pull out resistance.
To achieve that rating, the screw must penetrate the solid wood frame deeply. Subtracting half an inch for drywall thickness, your lag bolt must penetrate at least 2 to 2.5 inches deep into solid wood stud framing. Using shorter screws leaves your installation resting in weak outer sapwood or drywall depth, drastically reducing system safety.
Concrete, Masonry, and Brick Installations
Poured concrete, solid concrete block (CMU), and historic brick walls represent the ideal mounting surface. These structural masonry substrates offer supreme density, handling heavy static loads and dynamic lever forces without issue.
However, brick installations require careful attention to age and fastener placement:
• Poured Concrete: Anchor anywhere on the surface using expansion bolts or heavy masonry anchors.
• Concrete Block: Anchor into solid wall sections, or use heavy duty sleeve anchors inside hollow cores.
• Brick: Always anchor directly into the solid face of the firebrick itself. Never anchor into soft mortar joints between bricks. Mortar crumbles under sustained dynamic vibration, destroying fastener hold over time.
Metal Studs: Why Standard Lag Bolts Will Fail
Modern high rise condominiums, commercial office buildings, and newer apartment complexes frequently use light gauge steel studs instead of wood framing. These thin metal channels are designed exclusively for vertical wall loads, not heavy pulling forces.
If you attempt to drive a standard wood lag bolt into a steel stud, the screw threads will strip out the thin metal sheet within seconds, offering zero structural hold. Mounting to metal studs requires specialized hollow wall toggle hardware, such as steel SnapToggles, or installing double plywood backing boards across multiple steel studs to distribute pull forces safely.
Selecting the Correct Anchors and Fasteners
Using the wrong fastener in an otherwise perfect wall installation is the leading cause of DIY mounting failures. Match your hardware to your wall substrate every single time.
|
Substrate |
Recommended Fastener |
Never Use |
|
Solid Wood Studs |
5/16" x 3" Lag Bolts |
Plastic Anchors, Drywall Screws |
|
Concrete / Brick |
Concrete Sleeve Anchor |
Standard Wood Screws |
|
Metal Studs |
Heavy Duty SnapToggle |
Lag Bolts, Self Tapping Screws |
|
Hollow Drywall |
SnapToggle (Max 30lb) |
Plastic Expansion Anchors |
Lag Bolts for Solid Wood Studs
Heavy duty hex head steel lag bolts (typically 5/16 inch diameter and 3 inches long) are the industry standard for securing mount plates to wooden wall studs.
Always pre-drill pilot holes using a wood bit sized slightly smaller than the solid inner shank of the lag bolt (typically a 3/16 inch or 7/32 inch bit for a 5/16 inch bolt). Pre-drilling prevents the thick lag bolt from splitting the wooden stud along its grain line, which severely weakens the structural hold of the wood fibers.
Concrete Anchors and Expansion Bolts
Concrete anchors rely on physical force to lock themselves into solid masonry. As you tighten the bolt head, the metal sleeve expands inside the drilled hole, creating immense friction against the dense concrete walls.
Alternatively, modern masonry screws (like Tapcon anchors or concrete wedge bolts) cut deep threads directly into the stone wall. Always use a specialized masonry hammer drill bit to cut exact diameter anchor holes, blowing out lingering stone dust with compressed air before inserting concrete anchor hardware.
Toggle Bolts and SnapToggles for Hollow Walls
When mounting to metal framing studs or hollow concrete blocks, standard lag screws won't work. Instead, turn to heavy duty toggle bolts.
Snaptoggle Installation Mechanism:
-
Drill hole & insert channel metal bracket flat alongside straps.
-
Pull straps tight until the metal channel rests flat against the inside wall surface.
-
Slide plastic cap flush against OUTSIDE drywall, snap off excess straps.
-
Thread heavy machine bolt into central metal channel socket. ```
The preferred option is the SnapToggle channel anchor. Unlike traditional spring loaded butterfly toggle bolts that slip around loose inside walls, SnapToggles feature a solid metal anchor bar held in place by adjustable plastic guide straps. Once inserted through a drilled hole, the metal bar sits flat against the interior back side of the metal stud or drywall surface. You then screw a high tensile machine bolt into the threaded center collar, pulling the metal anchor flush against the wall for a firm, reliable hold.
Why You Should Never Use Standard Plastic Drywall Anchors
Small ribbed plastic expansion anchors, conical drywall plugs, and light duty plastic screw anchors belong nowhere near a television wall mount installation.
|
Fastener Type |
Suitable for TV Mounting? |
Reason |
|
Plastic drywall anchor |
No |
Designed for light static loads and can pull out under TV weight |
|
Lag bolt into wood stud |
Yes |
Anchors directly into solid timber framing |
|
Heavy duty toggle anchor |
Depends on wall and mount |
Suitable for some metal stud or hollow wall installations when correctly rated |
Plastic drywall anchors function by expanding outwards slightly inside fragile gypsum wallboard when a standard screw is driven inside them. They are designed exclusively for static light duty decorative loads, like small picture frames, wall clocks, or plastic hooks. The dynamic weight of a television will easily strip these plastic plugs straight out of the wall, causing catastrophic hardware failure.
Step by Step: Safely Calculating and Testing Your Setup
Avoid guessing during installation. Follow this systematic workflow to calculate total weight distribution, locate true wall framing, and stress test your mount assembly safely before hanging your television.
|
Step |
Installation Workflow |
|
Step 1 |
Calculate Total Load (TV + Accessories + Cable Drag) |
|
Step 2 |
Locate Stud Center Points with Deep Scan + Pin Test |
|
Step 3 |
Secure Wall Plate with Rated Structural Hardware |
|
Step 4 |
Perform Manual Static + Dynamic Load Stress Test |
1. Weighing Your TV (With and Without the Stand)
Never base your calculations on the gross shipping weight printed on the retail TV box, which includes packaging foam, accessories, heavy cardboard, and the desk stand.
Check the user manual specifications under "Weight (Net / Without Stand)." If you can't find the manual, weigh yourself on a digital bathroom scale while carefully holding the display panel, then subtract your own body weight.
Remember to add the weight of any attached hardware accessories:
• Soundbars and lower bracket mount arms (typically 8 to 20 lbs)
• Streaming media boxes, mini consoles, or power strips (1 to 3 lbs)
• Heavy gauge HDMI cable bundles that pull downward on the frame (1 to 2 lbs)
Add all accessory weights together to calculate your Total Operational Display Weight. Verify that this total number remains well below the rated max limit of your mount hardware.
2. Locating and Verifying Wall Stud Integrity
Finding the exact center of a wooden stud is critical. Driving a heavy lag bolt into the thin outer edge of a stud splits the wood, drastically compromising anchor hold.
-
Use an Electronic Deep Scan Stud Finder: Move the tool horizontally across the wall surface, marking both outer edges of the stud with a pencil. The midpoint between those lines marks the true center.
-
Verify with a Small Magnet: Sweep a strong neodymium magnet vertically along your center line to locate hidden drywall screws. Drywall screws are driven directly into the center of wood framing studs, giving you visual confirmation of the stud line.
-
Perform a Physical Pin Test: Take a small finishing nail or a tiny drill bit and tap test hole probes into your marked center point through the drywall. You should feel firm resistance as the nail bites deeply into solid wood framing, rather than slipping effortlessly into empty wall cavity air.
3. Factoring in Soundbars and Added Accessories
Mounting a soundbar directly beneath the TV display panel using metal rail extension brackets creates a single unified media assembly.
|
Component |
Installation Consideration |
|
TV display |
Main load supported by the wall mount |
|
VESA rails |
Connect the TV securely to the mounting bracket |
|
Soundbar bracket |
Adds extra weight below the TV |
|
Soundbar |
Increases the total system weight and may affect balance |
This configuration lowers the center of mass across the entire mounting plate assembly. When calculating physical clearance and arm tilt torque on full motion mounts, remember that adding length downward increases leverage strain on the main wall bracket. Adjust internal tilt resistance tension knobs to compensate for this added lower weight.
4. Performing a Safe Mount Stress Test Before Hanging the TV
Before hooking your expensive TV onto the wall bracket, perform a manual mechanical stress test.
-
Fully secure the wall mounting plate to the framing studs using all designated lag bolts.
-
Grasp the mount frame or extension arms firmly with both hands.
-
Apply steady downward body weight pressure onto the mount frame, gradually putting a significant portion of your weight onto the hardware.
-
For articulating mounts, pull the arm out to its furthest extension point and apply firm downward force.
If the wall plate creaks, flexes the drywall surface, or visibly pulls away from the wall, stop immediately. Your fasteners are slipping, splitting the framing wood, or missing the stud center entirely. If the frame remains rigid and solid against the wall under manual pressure, your mount setup is safe and ready for the display panel.
Common Mistakes That Cause Mount Failures
Even seasoned home improvers make fundamental errors during installation. Avoid these critical mistakes to keep your installation safe and secure.
Installation Issue |
What Happens |
Recommended Fix |
Missed stud centre |
The bolt may enter the weak outer edge of the stud |
Locate and drill into the centre of the stud |
Over tightened bolt |
Wood fibres can strip or split |
Tighten firmly without excessive force |
Correct centre placement |
The bolt anchors into solid timber |
Confirm stud centre before drilling |
Over tightening Lag Screws and Stripping Wood Studs
It is easy to assume that driving a lag screw as tightly as possible creates a stronger hold. However, over torquing heavy steel lag screws with power impact drivers routinely strips out internal wood fibers inside the stud framing.
When a lag bolt rotates inside its pre-drilled pilot hole, its sharp metal threads tear away the soft internal wood grain, turning structural pine into loose sawdust. Once stripped, the bolt's pull out resistance drops dramatically. Tighten lag screws firmly using a manual socket wrench until the bolt head sits flat against the washer and mounting plate. Do not apply excessive force past snug contact.
Missing the Center of the Wall Stud
A lag bolt driven into the outer quarter inch edge of a 2x4 wood stud might feel secure initially. However, under the heavy static load of a TV, that thin slice of edge wood will split along its grain line.
|
Stud Area |
Suitable for Mounting? |
Reason |
|
Centre of stud |
Yes |
Provides the strongest and most secure fixing point |
|
Near the outer edge |
No |
The wood may split under load |
|
Outside the stud |
No |
The fastener may only enter drywall and provide insufficient support |
Always double check your stud center measurements using a pin probe test before drilling structural pilot holes. Ensure your hardware seats deep into the solid central core of the wood framing.
Underestimating Full Motion Pull Out Distance
A full motion mount that sits close to the wall when retracted can create severe leverage forces when fully extended. Home owners frequently test mount stability with the screen pushed flush against the wall, forgetting that pulling the display forward out into the room multiplies structural torque on the upper wall anchors.
Always calculate total load distribution based on the mount's maximum extension length, not its closed position against the wall.
Using Hardware Included in the Box Without Checking Quality
Many low cost wall mounts ship with generic hardware kits made from soft, low grade pot metal. These cheap lag screws can shear off at the head under moderate wrench torque, leaving a broken threaded stud stuck deep inside your wall framing.
Inspect all included hardware carefully before installation. If the lag bolts feel light, show uneven casting threads, or lack grade marks on the screw heads, discard them. Spend a few dollars at your local hardware store on high grade American National Standards Institute (ANSI) certified steel lag screws and heavy flat washers.
What to Do If Your TV Exceeds the Weight Limit
If your television exceeds your current mount's load rating, or if your room layout forces you to mount in a spot without framing studs, several alternative solutions can handle heavy displays safely.
|
Alternate Mounting Option |
How It Works |
|
Dual Stud Plates / Plywood |
Spreads dynamic load across multiple framing members |
|
Hybrid Floor / Stands |
Rests load on floor; wall anchors prevent tipping |
Upgrading to a Heavy Duty Commercial Mount
Standard residential mounts are engineered for typical home theater layouts. Commercial grade wall mounts, on the other hand, are built using heavy gauge cold rolled steel, reinforced tilt pivot points, and wide wall plates designed to hold heavy digital signage displays in public arenas.
Upgrading to a commercial grade dual arm mount boosts your weight capacity up to 150 or 200 pounds while providing smoother articulation and greater peace of mind.
Using Dual Stud or Multi Stud Mounting Plates
If your wall stud spacing is unusual (such as 24 inch centers) or your TV's weight demands broader load distribution, install an external backing plate:
-
Cut a piece of three quarter inch cabinet grade Baltic birch plywood wider than your intended mount area.
-
Secure this plywood panel directly across two or three wall studs using multiple heavy duty structural wood screws.
-
Paint or stain the plywood board to match your wall or media room decor.
-
Mount your heavy duty TV bracket directly to the reinforced plywood panel using machine bolts with rear backing washers.
This setup distributes dynamic pulling force across multiple studs, allowing you to position your TV anywhere along the board regardless of hidden stud spacing.
Alternative Solutions: Floor Stands and Ceiling Mounts
When wall mounting isn't an option due to weak drywall, metal studs, or historic plaster, consider alternative display mounts:
• Hybrid Floor Consoles: These sleek steel column stands rest on the floor behind your media furniture, bearing the panel's weight on the floor while using small anti tip tether straps anchored higher up the wall.
• Structural Ceiling Mounts: Ideal for open concept rooms or concrete ceilings, these telescoping steel pipes anchor directly into overhead floor joists or concrete slabs, dropping the display screen down to your preferred viewing height.
Frequently Asked Questions About TV Mount Safety
Do TV mounts have a safety factor built in?
Yes. Name brand wall mounts certified by independent laboratories like UL (Underwriters Laboratories) or TÜV Rheinland feature built in safety margins. UL 1678 standards require mounts to support four times their rated maximum load weight capacity without structural frame failure. However, this safety buffer accounts for real world variables like dynamic movement, house vibration, aging wood framing, and minor installation variations. Never intentionally exceed the manufacturer's printed weight rating.
Can I mount a 75 inch TV on drywall without studs?
It is strongly advised against mounting a 75 inch screen on bare drywall without stud support. A typical 75 inch TV weighs between 60 and 85 pounds. While heavy toggle anchors like SnapToggles claim high static holding power in laboratory settings, bare gypsum drywall lacks the internal shear strength to handle dynamic torque, panel adjustments, or accidental bumps over time. A display of this size must be anchored securely to wood studs, metal framing channels, or concrete masonry walls.
Are cheap TV wall mounts safe for heavy TVs?
Not all low cost mounts are unsafe, but budget models often cut costs on material quality and hardware standards. Cheaper options may use thinner steel plates, weaker joint welds, low grade assembly screws, and lower static weight ratings. When hanging a heavy, high end screen, look for a UL certification mark, robust steel construction, and heavy duty dual arm articulation rather than choosing the cheapest mount available online.
How do I know if my wall studs are strong enough?
Standard 2x4 or 2x6 wooden framing studs in sound, dry condition are more than strong enough to support heavy consumer displays. A single 5/16 inch lag bolt driven two inches deep into the center of a healthy pine stud can support hundreds of pounds of vertical shear force. As long as your house framing is free from water damage, dry rot, or insect damage, and your lag screws seat firmly into the center of the stud wood, your framing studs will easily handle the load.
Share:
Monitor Arm for Ultrawide Monitor: Complete Buying Guide
How to Mount Projector to Ceiling: Simple Installation Guide